

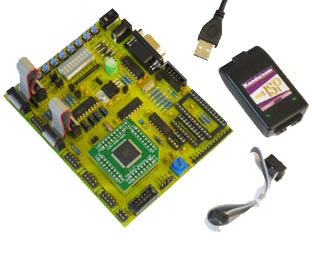
AVR Studio
Create a C project in AVRStudio and make sure the AVR device is the one you want to use. WinAVR C is very fussy about the correct device and although the code will compile, it will not run properly unless the AVR microcontroller type is correct
To change AVR microcontroller, go to Project > Configuration Options and select correct AVR.
Note that only the C Compiler project changes, not main project device type. Also change Optimization to -0s otherwise compiler has problems with delay routines
If you found this information useful, please give us a mention or share it on Social media.

Create a C project in AVRStudio and make sure the AVR device is the one you want to use. WinAVR C is very fussy about the correct device and although the code will compile, it will not run properly unless the AVR microcontroller type is correct
To change AVR microcontroller, go to Project > Configuration Options and select correct AVR.
Note that only the C Compiler project changes, not main project device type. Also change Optimization to -0s otherwise compiler has problems with delay routines
//change to match target clock
//Note: default AVR CLKSEL is 1MHz internal RC
#define F_CPU 8000000UL  // 8 MHz
#include <avr/io.h>
// For AVR registers - change device in Project - Configuration Options
#include <util/delay.h>
// for delay routine

/* Read Keypad on PortD and output binary result on PortB LEDs
   Keypad has 7 pins - 3 columns and 4 rows. When a key is pressed, Column and
   row goes low. To read it, set columns as inputs (bit 0..2) and wait for 0
	 on these bits. When column goes low, add to value (+0, +1 or +2) and then
	 set port to read rows. Read row and add 1, 4, 7 or A to value depending on
	 row Output value on LED - after inverting it (0 = LED on) output is
	 keypad.hex in default folder */

void LED_init(void)
{
   DDRB = 0xFF;
   PORTB = 0xFF;
    // set LEDs to output, 1 = LED off
}

void LED_display(unsigned char value){

	PORTB = ~value;  // 0 = LED on
}

void Col_init(void)
{
   DDRD = 0xF8;  // bit 0.2 are columns (0 is input)
   PORTD = 0x07;  //pullups on these bits
   //very short delay
    asm volatile ("nop");
    asm volatile ("nop");
}

void Row_init(void)
{
    DDRD = 0x87;  // bit 3..6 used for rows
    PORTD = 0x78;  //pullups on these bits
    _delay_ms(1);
}

unsigned char Read_key(void)
{
  unsigned char value;

  Col_init();      //set up columns to read

   value =0;       // init value
  		// read columns first - 0 if key in that column pressed
       if (!(PIND & 0x01))
			    {value = 2; }// Col2 = bit0 is low
       else if (!(PIND & 0x02))
			    {value = 1;}   // Col1 = bit1 is low
       else if (!(PIND & 0x04))
			    {value = 0; }	// Col0 = bit2 is low

       Row_init();   //set up rows to read

				//row3 = bit 3 is low
       if (!(PIND & 0x08))
			    {value += 0x0A; }
       else if (!(PIND & 0x10))
			    { value += 0x07; } //row2 = bit 4 is low
       else if (!(PIND & 0x20))
			    { value += 0x04; } // row1 = bit 5 is low
       else if (!(PIND & 0x40))
			    { value += 0x01; } //row0 = bit 6 is low

	   _delay_ms(50); // switch debounce
	   return value;  // value is sum of row and column
}

int main( void )
{    unsigned char  led;

    LED_init();      // initialize LEDs
	  led = 0x00;      // init variable
	  Col_init();      // set keypad column read

    while(1)        // Eternal loop
    {
	    if (!(PIND == 0x07)) {
// if a column is pressed bit 0,1 or 2 will go low active 0
	        led= Read_key();   // read keypad
      }
	    LED_display(led);      // display result
    }
}
If you found this information useful, please give us a mention or share it on Social media.