
Microchip took over Atmel some years ago and are slowly eliminating the Atmel brand. One of the major legacies from Atmel is their Atmel Studio development environment but its days may be numbered.
There is no need to panic but it is inevitable that one day Atmel Studio will disappear and MPLAB X will replace it. Microchip have already produced a Microchip Studio version, which is just a rebranded Atmel Studio but are also busy adding AVR support to MPLAB X.
It has reached the point where you can import Studio projects into MPLAB X very easily and use either Atmel or Microchip tools for programming and debugging.
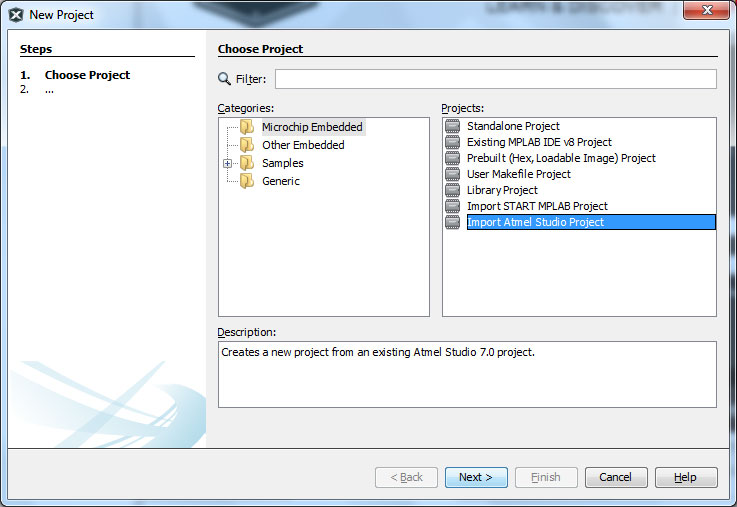
Import Studio Project in to MPLAB X
You first need to create a New Project (File -> New Project). In the New Project Dialog that opens, select Category as Microchip Embedded and Projects as Import Atmel Studio Project. Click Next button.
Select Your Atmel Studio Project
Select your Atmel Studio project – this only works with C projects (.cproj), see note below for Assembler projects (.asmproj).
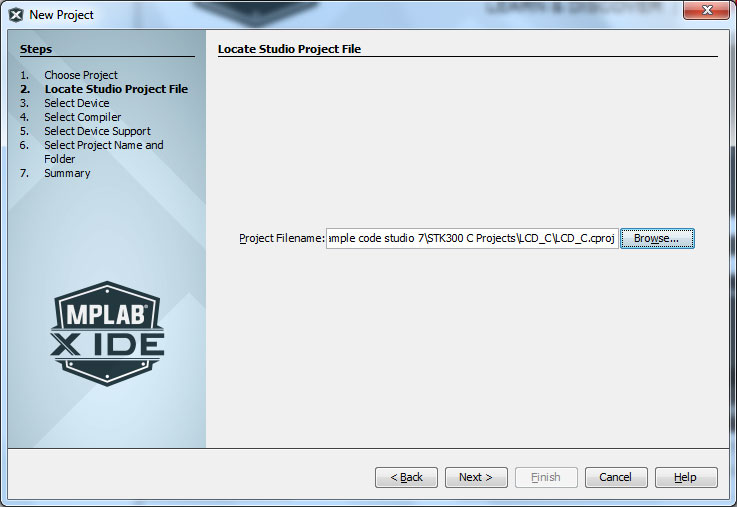
MPLAB X will create a sub-folder in your Atmel Studio project folder to store the completed MPLAB X project. It will be called Project Name.X, in this example LCD_C.X
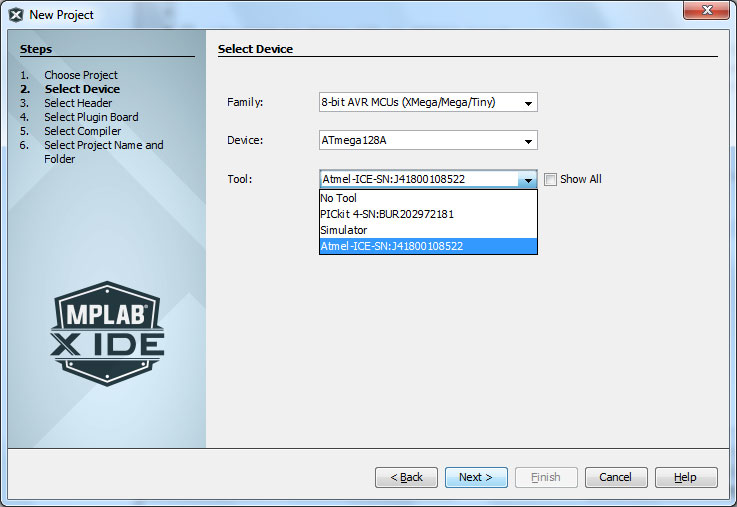
Select Device and Tool
Click Next button and on next screen, select Device Family as 8-bit AVR MCU and then your AVR device, in this example ATmega128A to match the device in your Atmel Studio project.
Available Tools
Only a few more recent tools will work with AVR in MPLAB X, which may be a reason to not change IDE for the moment, if you have an older tool.
Tools that work
- Atmel-ICE
- PICKit 4
Tools that don’t work
- AVR Dragon, AVRISP-MKII, JTAGICE-MKII
- PICKit 2, PICKit 3, MPLAB SNAP
Select the tool you have available or use Simulator for debugging.
Select Tool Chain
On the next screen you set the tool chain.
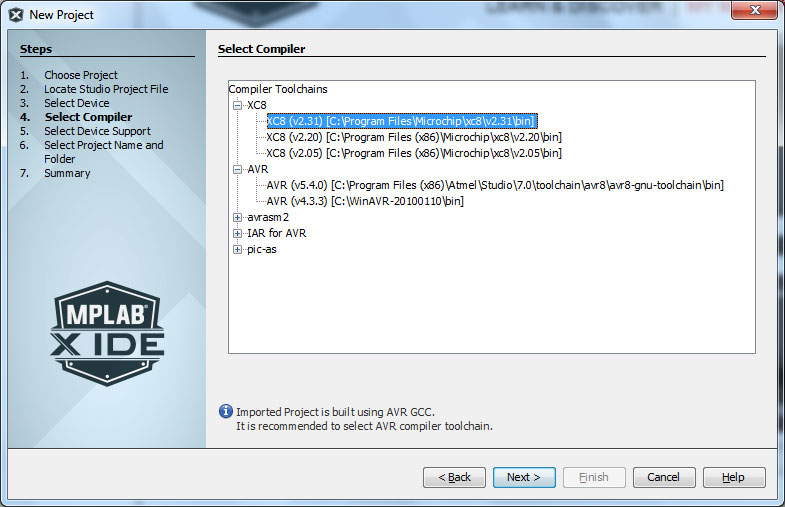
In most cases, you will want to select an AVR C compiler, either GCC or WinAVR. A simple project will compile with XC8 as it now supports AVR devices but there are syntax differences that will usually require changes before it will compile.
If you have time, you may want to try XC8 and work through the compile errors as it is a very good compiler and represents the future. Here is a guide to using XC8 compiler with AVR:
XC8 AVR Guide – opens in new tab.
Device Support Packs
If you select XC8 C compiler it will use its built in device library but if you select AVR GCC or WinAVR, you will get this message.
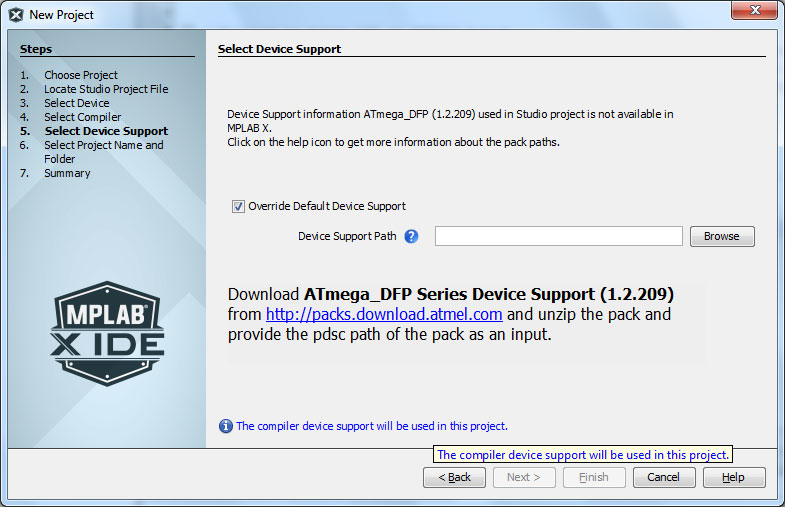
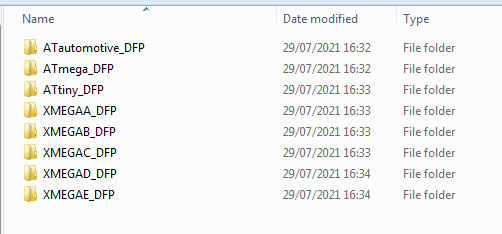
MPLAB X needs the AVR DFP Device support pack to compile your project using WinAVR or AVR GCC compilers, in this case ATmega_DFP. There are different packs for ATmega, ATtiny, Automotive and different ATxmega series.
The link shown on screen to Atmel.com does not work so you will need Atmel Studio installed.
These device support packs will be in a folder called packs in Studio 7 folder under Atmel folder in Program Files. Browse through Program Files (x86) – Atmel – Studio – 7.0 – Packs – Atmel.
Select the correct folder and click on .pdsc file to select it as Device Support Path.
Give Project a Name
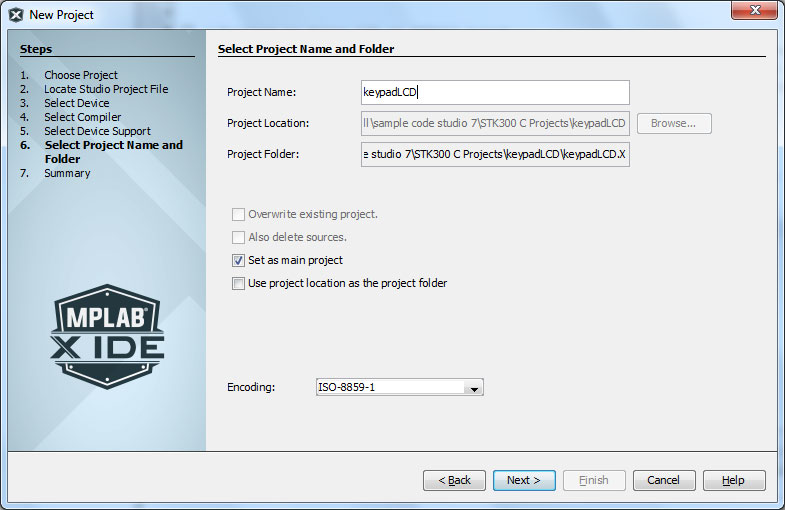
MPLAB X will have loaded your Atmel Studio project and folder, just click next to keep these the same. MPLAB X will create a .X sub-folder with all the new MPLAB X project in it.
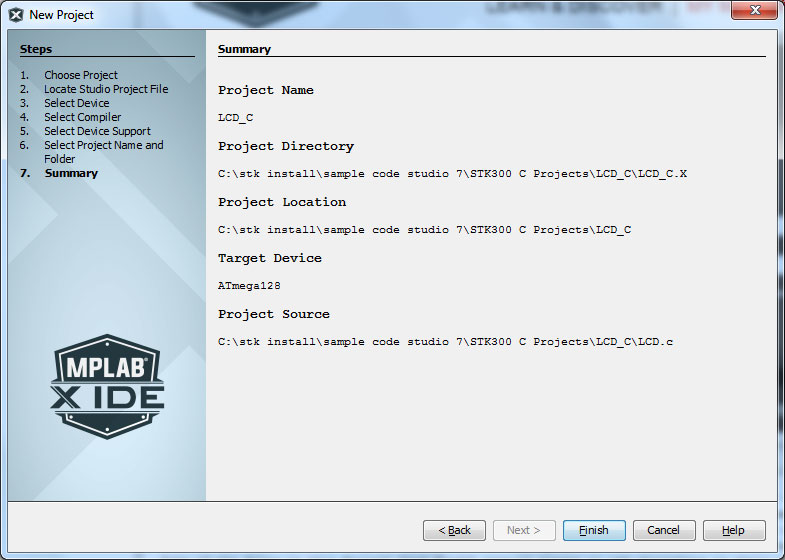
Summary
The last screen of New Project Wizard is a summary of everything. Click Finish to create your new MPLAB X project.
Your new project is ready to compile and debug in MPLAB X.
Assembler Projects
MPLAB X will not recognise Atmel Studio ASMPROG as a valid project type so will not convert it automatically. Instead, you will need to create a New Standalone Project, select AVR family and your AVR device then select AVRASM2 as the toolchain.
Finish creating the new project and add your existing .asm files to source code section of the project.