
Kanda standalone handheld programmers, for AVR and PIC microcontrollers, are really simple to use. Once loaded from PC, you just select the correct slot and press the button. Now we have made it easy to add this simple operation to your ATE system.
A common problem is adding microcontroller programming to your ATE system. This is often solved with DLLs and command line interfaces but, especially for Labview, our handheld programmer provides a simpler solution.
We have added a connection interface to our standalone programmers that allows external control of the programmer. The programmer can be started via this interface, monitored for program complete and pass or fail easily determined.
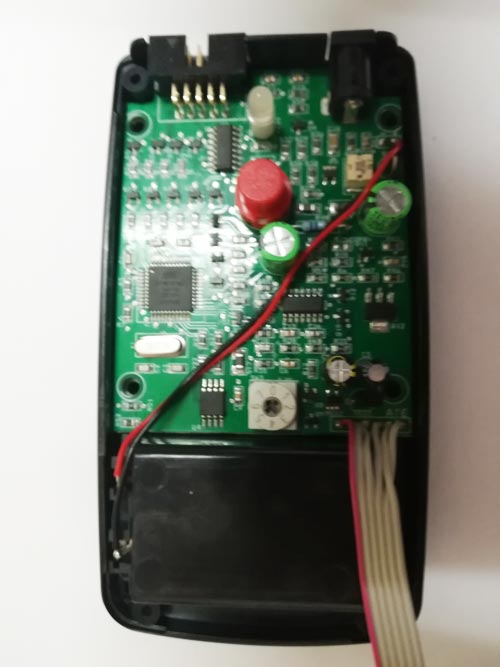
AVR Microcontrollers
We have brought all the required signals out to a 6-way connector on the handheld PCB. You just need to connect a 6-way ribbon cable as an interface:
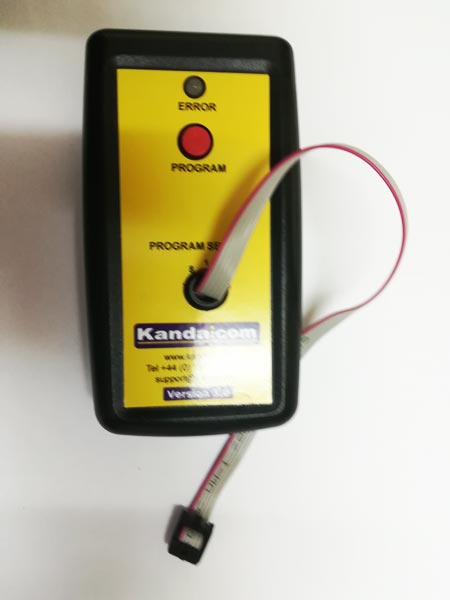
PIC Microcontrollers
With PIC handheld programmer, we have produced a version with the 6-way cable already connected:
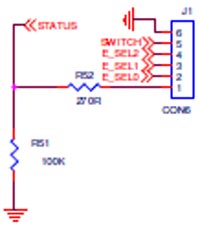
Connector Layout
The layout of this 6-way ATE interface is the same for both PIC and AVR. Use the red wire on the cable for orientation. For both PIC and AVR red wire should be status.
SWITCH (INPUT)
Drive at TTL logic levels or open drain (just pull low). Pull Low to start programming. The line should be released after 100mS (Not critical, but must be released by the end of programming).
SLOT SELECTION LINES, SEL0, SEL1, SEL2 (INPUT)
These can be left disconnected if you are using a single programmer, HH0120V3. On an 8-way programmer (HH0820V3 or PIC-HH081ATE), they are used to select the slot to be used instead of the rotary switch.
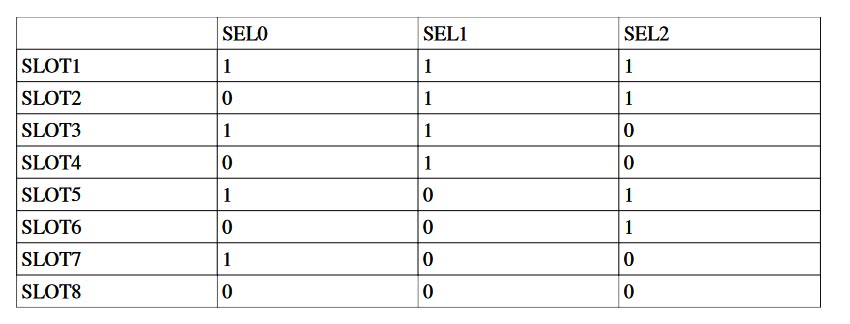
Drive at TTL logic levels, or open drain. Pull lines marked “0” low as indicated in the table. The rotary switch on the programmer may be used to select a slot for test purposes. Otherwise, it must be left in the slot 1 position – (marked as 0 on the switch itself, as this is marked 0-7).
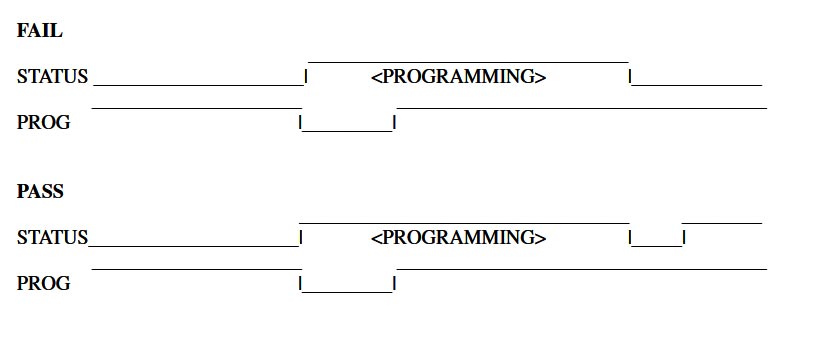
STATUS (OUTPUT)
TTL output . Goes high when programming, then low when programming finished. PASS/FAIL is indicated 100mS after the end of programming. If programming was OK, the line goes high. If it was a fail, the line stays low.
Conclusion
The Kanda standalone handheld programmer is very easy to add to your ATE system, using the 6-way ATE interface, whether you are using Labview or any other software solution.
PIC ATE Version https://www.kanda.com/products/Kanda/PIC-HH081ATE.html
AVR 8-way Handleld programmerhttps://www.kanda.com/products/Kanda/HH0810V3.html
AVR Single Programmer https://www.kanda.com/products/Kanda/HH0110V3.html