
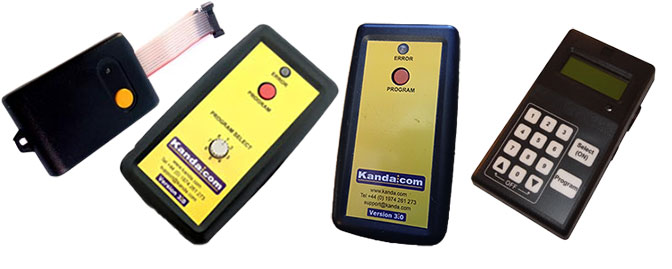
Kanda produces several tiers of standalone AVR programmers designed to bypass the need for a PC or complex development environment (like Microchip Studio) during deployment. They are heavily utilised for factory production lines, field service updates, and distribution to end-users.
Kanda’s standalone lineup is divided into three primary form factors:
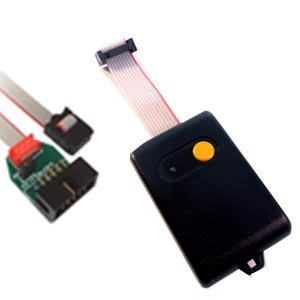
AVR Keyfob Programmers
Best For: Field service engineers, customer firmware updates, and low-cost deployment.
Key Features:
- Extremely compact (car-keyfob sized, ~28g).
- Typically powered by the target circuit itself or via a PC during code loading.
- Packs 256KB of memory for flash and EEPROM data.
- Single-button operation: simply plug it into the target board and press the button to execute a full flash, EEPROM, fuse, and lock-bit update.
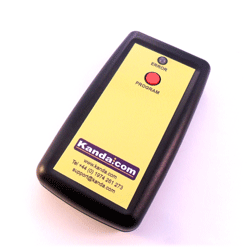
AVR Handheld Programmers (Single & 8-Way V3 Models)
Best For: Production lines and repetitive programming by unskilled operators. Also for field updates.
Key Features:
- Powered by an internal 9V battery or an external power supply, featuring robust circuit protection against faulty target boards.
- Automatically wakes up when connected to a target.
- Generous memory capacity (up to 512KB).
- Can power the target microcontroller directly (up to 150mA).
- 8-Way Version: Features a rotary switch allowing you to store up to 8 different target programs or configurations on a single unit, making it easy to switch between projects on a workbench.
- Features a simple LED indicator (red/green) for pass/fail notification.
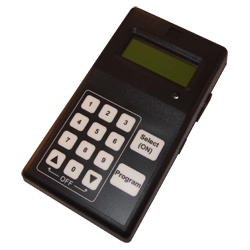
Kanda AVR Portable Programmers (LCD & Keypad)
Best For: Advanced field engineering and technicians managing multiple different firmware builds.
Key Features:
- Equipped with an LCD display and a physical keypad.
- Can hold up to 32 different AVR target configurations and program slots, allowing the user to browse and select the correct file directly on-site.
- Includes a battery charger, USB loader dongle, and straightforward utility software.
Supported Interfaces
Across their standalone range, Kanda units support modern and legacy AVR communication protocols, including:
- ISP (In-System Programming)
- UPDI (for newer AVR-Dx and megaAVR 0-series/1-series devices)
- JTAG / PDI (for ATxmega devices) – not Keyfob programmer
- TPI (Tiny Programming Interface) – not Keyfob programmer
Production Line Example
Setting up a production line flashing station with standalone AVR programmers removes the need for slow, cumbersome development environments like Microchip Studio or Arduino IDE on every workstation. Operators can flash boards rapidly with minimal training.
- 1.Configure the Master Image on a PC:Initial Setup.
- Connect the standalone programmer to a PC using its USB loader dongle. Use the manufacturer’s utility software to upload your compiled HEX or ELF files, configure the target fuse settings, define lock bits, and set up EEPROM data.
- Verification: Check that the configuration software reports a successful download and stores the data into the programmer’s internal memory.
- 2.Lock Down the Programmer Settings:Security & Error Prevention.
- To prevent assembly operators from accidentally altering firmware or changing fuse configurations, enable configuration locks or password protection if supported by your device. Many units also allow you to set program cycle limits or clone the exact setup to secondary programmers for multi-station assembly lines.
- Verification: Attempt to alter a setting on the device without proper authorization credentials to ensure restrictions are active.
- 3.Establish Power and Target Connections:Wiring & Jigs.
- Wire your target test jig to match the appropriate programming header (such as 6-way/10-way ISP or modern 3-pin UPDI: VCC, GND, UPDI). Decide whether the standalone programmer will power the target board directly (many units supply up to 150mA at 3.3V/5V) or if the target will use an independent bench power supply.
- Verification: Measure the voltage across VCC and GND on the target test pins with a multimeter to ensure correct power delivery before initiating a write cycle.
- 4.Run a Test Flash Cycle:Execution.
- Connect the configured programmer to a blank or test target board and press the single physical execution button.
- Verification: Watch the status indicators on the programmer. A solid or flashing green LED signals a successful program and verify pass, while a red flash indicates a checksum, fuse, or connection error.
Field Programming Example
Using a Kanda standalone programmer for firmware updates in the field removes the need to haul laptops, awkward power bricks, or heavy development rigs into machine rooms, enclosures, or tight spaces.
- 1.Preload and Lock Configurations on the Bench:Preparation.
- Connect your Kanda handheld or keyfob programmer to a PC via its USB loader dongle. Use the Kanda configuration utility to load the correct
.hexor.binfirmware file, set your target fuse and lock bits, and lock the configuration if you want to prevent accidental field alterations. - Verification: Confirm that the utility software registers a successful transfer and that the unit’s local storage slots match your desired field version.
- 2.Isolate the Target Hardware:Power & Safety.
- Power down the target equipment completely using its main breaker or service switch to prevent accidental shorts or erratic behavior while making physical connections.
- Verification: Check for zero voltage across the target board’s power rails using a multimeter before touching any internal connectors.
- 3.Connect to the Target Header:Physical Link.
- Plug the programmer’s cable into the board’s programming header (ISP, UPDI, JTAG, or TPI). Ensure the pin-1 alignment indicator matches the board layout.
- Verification: Visually inspect the ribbon cable connector to guarantee that VCC, GND, and data lines match up correctly without pin offsets.
- 4.Execute the Update:Field Execution.
- Power on the Kanda unit (using its internal battery or target power) and press the primary push button to execute the write and verify cycle.
- Verification: Check the programmer’s indicator lights; a solid green light confirms a 100% successful program and verify pass, while a red light indicates a connection fault or verification error.
Summary
Kanda standalone programmers are perfect for programming AVR microcontrollers on the production line or in the field. They solve all your programming problems with one neat elegant solution.