
You can use a normal AVR ISP programmer to upload Arduino sketches to an Arduino board or to an AVR microcontroller in your own circuit, such as ATmega328P, ATmega8 or ATmega2561, but first you need to know how to find the hex files that the programmer needs. The Arduino IDE makes this as hard as possible for some reason. This post shows you how to find them and also how to make Arduino put them in an easier place to find in future.
Any ISP will need what Arduino calls output binaries and the rest of the world calls HEX files. These are produced when you Verify/Compile your sketch and contain the data the AVR microcontroller needs to run. The Arduino IDE creates them in temporary folders in your user libraries or /tmp folders on MAC, with a typical path like this
C:\Documents and Settings\your_username\Local Settings\Temp\build3526495849735274299.tmp.
This changes with every build, which makes it really difficult to locate them, especially the most recent version. A better way is to change the Build Path in Arduino so it puts them somewhere sensible.
The method has changed in Arduino 2.0 so see later section for this version
Arduino Version 1
Run Arduino IDE and choose File -> Preferences. This dialog box will appear,
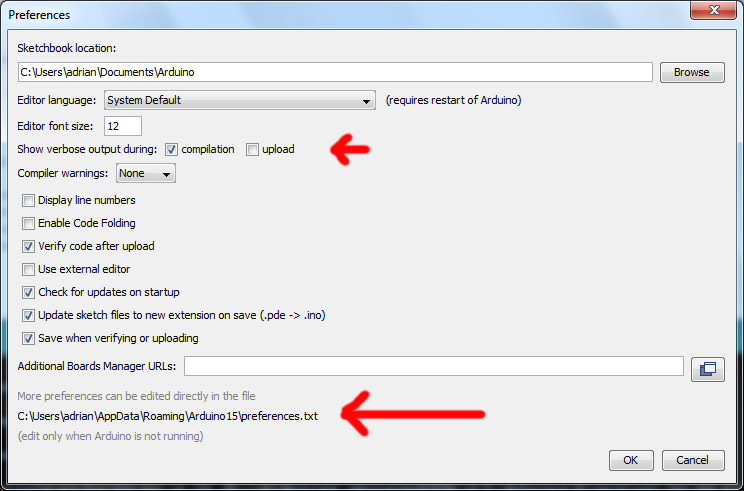
Switch on Show Verbose Output During Compilation so we can see what is going on. This may be useful later and can always be switched off again. At the bottom is a path to your preferences.txt file that we are going to edit. This path is different on different Operating Systems and in some cases may be hidden by your system. If you can’t find this path in Explorer, try Organise -> Folder and Search Options -> View Tab and select Show hidden files, folders and drives.
Once you have found preferences.txt file, close your Arduino IDE and open this file in a text editor like Notepad. Add a build path anywhere in the file. Here is an example but select your own preferred folder location.
build.path=C:\Myproject
Important Note: You must create this empty folder yourself now as Arduino won’t and will give errors.
Save the file and reopen Arduino and Verify/Compile your sketch again. This time the output files we need should always appear in the folder you have added to preferences.txt. This path should also appear towards the end of the Arduino output window after a successful compile.
If everything has gone right, your folder should be full of output files, mostly with .o and .d extensions. These are used by linker and can be ignored. The important files will be these, where the sketch is called Blink1.ino, so look for your own sketch name –
- blink1.ino.cpp – output C file, actually C++
- blink1.ino.elf – output file for a debugger
- blink1.ino.eep – EEPROM file for programmer
- blink1.ino.hex – flash (code) file for programmer
The C file (.cpp) and Elf file (.elf) can be used in AVR Studio development environment if you want to move away from just using Arduino IDE. We will cover this in a later post. The important files for the programmer are the .Hex and .EEP files. If you have used Arduino’s EEPROM library to add data to the AVR’s internal EEPROM, then it will be in the .EEP file, otherwise this file will still exist but it will be empty.
All that effort but we now have the .hex file that is required if we want to use a normal AVR ISP. The benefit of this approach is that now every time we change and rebuild our sketch, the location of the output hex file won’t change unlike the default Arduino behaviour.
Arduino Version 2
This version does not use preferences.txt and tries to hide everything even more successfully. Sketches are automatically saved in Documents folder but which documents folder as it varies with how Arduino sees the current user!
It is better, in our opinion to save you sketch somewhere more permanent on your local drive.
Compile your sketch using Sketch -> Verify/Compile as usual. Once your sketch has been compled successfully, the output files will have been created. Now go to
Sketch -> Export Compiled Binary
This will create a Build folder in your Sketch folder. This will have all the output files including Hex, EEP and ELF files in a board sub-folder. You will need to do this every time that you recompile your sketch as it doesn’t redo it automativally.
Now go to Sketch -> Show Sketch Folder and you will see Build folder with output files in it, in File Explorer.
Now we can locate the Hex file, we can look at how to use an AVR ISP like Kanda USB AVR ISP Programmer to program an AVR microcontroller.